Thursday, August 31, 2023
A Tale of Three I-Beams
Tuesday, August 29, 2023
Holding Up a House
Pilings, check. Grade beams and foundation, check. Drainage managed, check. City happy? Check! Now to get started! Sill plates were installed on the foundation walls and secured using the threaded rod encased in the concrete. A series of wood beams - 8x12 inches were installed across the breadth of the house and secured to the east foundation wall and the garage foundation wall on the west. These beams are holding up the house (they have a lot of help).
 |
| Future elevator shaft |
 |
| Stairwell bump out |
Sunday, August 27, 2023
Drains, Conduit, Gravel and Extended View
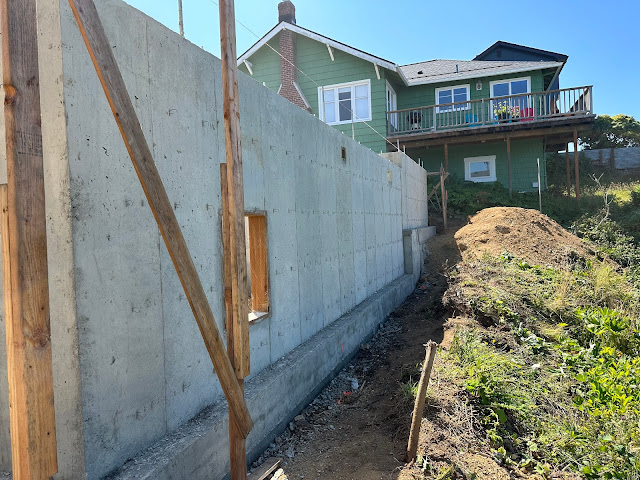
Once you have a foundation you build a house, right? Well, not according to the architect, engineers, builder and the City. First you have to install drainage. And a lot of it if you are building on a slope like we are. In fact, managing water, from around the foundation and off the decks was a major concern for the City. It's a part of the reason we have cantilevered decks instead of posts and why the permitting process took so long.
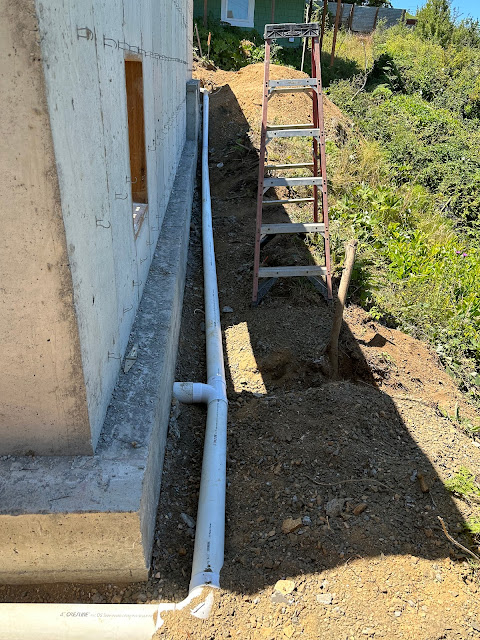
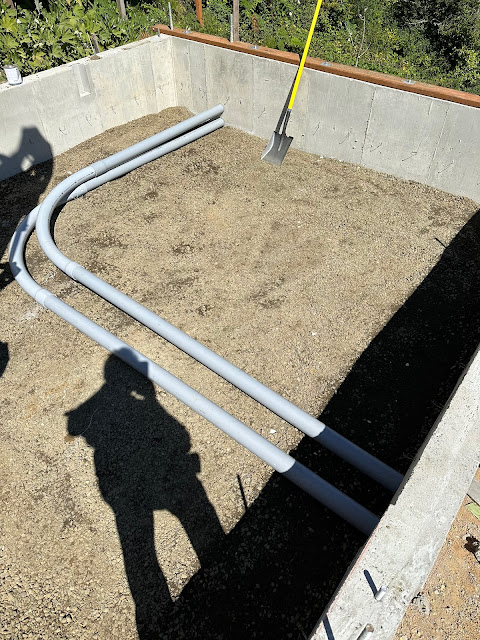
The foundation in place. Neal, the excavator guy, came back and after backfilling some around the grade beams, installed drain pipe all along the foundation of the house - amazingly called "foundation drains". The foundation drains all run to a sump pump installed in the crawl space, which then pumps any water collected from the foundation drains and the garage drain out to the street. While we waited for the City inspector to approve the drains Neal backfilled the garage with gravel up to the entrance point for the conduit from our future heat pump.
The conduit installed across the gravel and into the crawlspace, Neal proceeded to fill the garage with more gravel to about four inches from the top of the foundation.
 |
| Scott with Neal, the excavator guy |
Now this likely sounds fairly mundane to you, our reader, but to us it was something we had been awaiting for almost seven years. What was our view from the back of the house? It didn't disappoint!
The City inspector approved the drains and Neal got back to work. First laying landscape fabric over the foundation drains, he then maneuvered his excavator to backfill gravel around the foundation.
Wednesday, August 23, 2023
Laying a Foundation
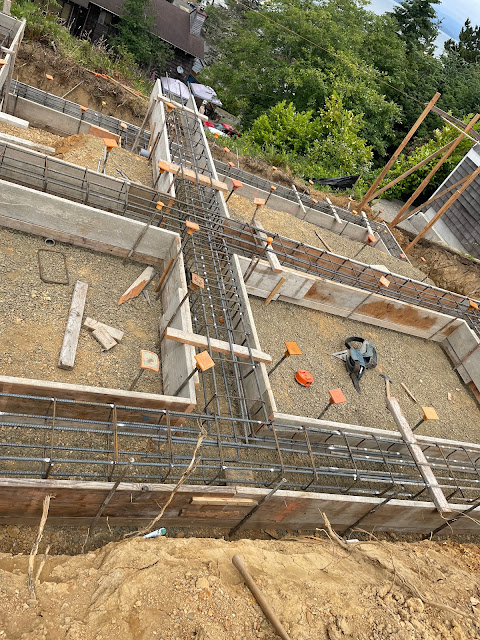
When last we checked in on 464 Astoria View we had grade beams. Grade beams are the foundation for the foundation and will keep the house from sliding down the hill, Rule #1. Next up, forms for the foundation! Pictured above, you see the exterior forms for the back and east side foundations (Scott for scale). The back foundation is quite tall because the slope of the lot starts about halfway through the house, and when they were excavating they had to carve down further than planned due to soil conditions.
 |
| Garage foundation forms and rebar |
 |
| East side foundation forms and rebar |
 |
| Foundation forms and rebar for the rest of the house |
 |
| Notice the threaded stainless steel rode sticking up from the foundation. These are tied into the grade beams and, secured to the sill plate, will make sure the house doesn't come off the foundation. |
 |
| Garage foundation |
 |
 |
| Back wall foundation. Notice the grade beams under the foundation. |
Monday, August 21, 2023
From Blank Slate to Design Development
In the fall of 2019 I was madly digesting everything I could about architecture and trends. The goal? Trying to figure out what kind of home we would build on the lot. Should it be modern? It would certainly stand out in the very traditional neighborhood. Craftsman? Lots of those in Astoria. Cape Cod with lots of gorgeous heavy woodwork? That one got a resounding "No". We started thinking about what we wanted - simple, easy, timeless. Not overdone. I hit Houzz.com, looking through interior and exterior photos, showing select ones to Scott (who did not enjoy this process near as much as I did). We eventually settled on modern with a Scandinavian influence.
 |
| Mangosteen House, designed by Chadbourne+Doss |
I started following architectural firms on Houzz that were in the Pacific Northwest and skewed modern. There are a lot of good ones in Seattle and Portland. And I quickly found that almost all of them had a minimum contract well over our budget. One of the firms, Chadbourne+Doss, responded that they work on both big and small projects and were intrigued by our lot and the prospect of building modern in the small traditional neighborhood. And in addition to their main offices in Seattle, they had a location in Astoria. Their project photos on Houzz were very enticing.
We met Daren Doss at the lot on the day of the core drilling in March of 2020. It was cold and blustery, normal for Astoria, and we talked about our requirements and vision for the house. Daren thought it could be done and we decided to follow up in the next week with a full conversation and next steps. We drafted our basic requirements as follows:
- House must not slide down the hill
- See rule #1
- Do not skimp on external (envelope) materials
- Do not over-build for the neighborhood
- Age-in-place (elevator is an option)
- Clean, well-edited design (think Scandinavian modern-ish)
- Green building and energy where practical - leading, not bleeding, edge
- Quality, not quantity - no underused space
- Focus on views on each level
- Smaller private spaces, larger public spaces
- Master with private balcony
- Large main floor balcony
- Lower level recreation/bunk room
We were assigned homework. A list of questions like, "If your house were a car, what kind and why?" to which we answered: A Mini Cooper S because it's fun, yet practical; sporty and fuel efficient; bigger on the inside than it is on the outside. There were a lot of questions about movies and music, what our days look like, our routines. How we wanted to live in and out of the house. It was fun and made us think about what we really wanted.
The Design Development phase included two major iterations in May and July 2021. The biggest surprise was the flat roof - it disappeared. This was a disappointment because we really liked the look, but the roof was just too big to do it well. And we wouldn't be able to take advantage of solar energy in a big way, which is something we really want to do, so shed roof. Other changes between iterations were exterior materials and kitchen window height, the addition of a powder room and butler's pantry, firewood storage and a three foot bump out at the stair landing that changed the back elevation in a positive way.
Friday, August 18, 2023
That's a Lot of Steel
What's a Grade Beam?
Not being an architect or engineer, I have very little knowledge of what goes into building a house. When the architect said we would have to build the house on pilings I imagined the house up on stilts like you see at the beach on the east coast. (My grandfather, a home builder his entire life, would be aghast.) Our architect quickly disabused me of that notion, explaining that the pilings would been in the ground and that grade beams would connect them to create a very sturdy platform on which to build our house. Cool. what's a grade beam? Off to the internet for answers.
Wednesday, August 16, 2023
Rule # 1
Over three years ago, on a rainy, chilly morning in March 2020 large machinery set up under the tree to drill for core samples on our lot. Greeted by a sign bidding neighbors to "say goodbye to this tree/view" it didn't feel terribly welcoming. But, change is hard and folks don't like it.
When Scott and I approached the geotechnical engineering firm the first thing we told them was "Rule #1. The house can't slide down the hill." Rule #2? See rule number one. After initial geotechnical review we were told that we could likely get by with a standard foundation - Yay!! Standard foundations are much less expensive than more complicated ones. Further reviews and a change of ownership of the geotechnical firm resulted in the bad news. Yes, the lot is buildable, but you will need a much more robust foundation which includes pilings and grade beams and it will cost significantly more. Sigh. But rule #1, the house can't slide down the hill.
So here we are three years later annoying the neighbors once again. Actually, the neighbors have been really great for the most part and Scott has done his level best to be a good neighbor. But it's easy to understand how disruptive new construction can be, especially when the new constructions requires pilings. Twenty of them.
Starting in the northeast corner of the foundation, Pile King (yes, it's really the name of the company) pounded a 21 foot piling into the earth with a 3,000 pound weight. With the aid of a coupling they added another 21 foot piling, and another... In total the northeast most piling was driven in 45 1/2 feet! Fortunately that corner of the lot was the softest ground and most of the pilings didn't need to be driven near as far down.
Compelling video...right? And just a bit noisy. You can empathize with our future neighbors! Over two and a half days twenty pilings were driven into the earth. Still, the plans called for 546 feet of 6 inch diameter pilings with 1/2 inch walls. Due to soil conditions a total of 811 feet of pilings were driven into the ground. The pilings were load tested to ensure they could handle the weight of the structure to be built on them. We were told we could build a skyscraper on them. I guess that checks off rule #1!


